

A number of years ago I wrote a book titled “The Beauty School Dropout’s Handbook – A Guide To Vintage Hair & Makeup Styling”. This is an extract from my book showing you how I do Victory Rolls.
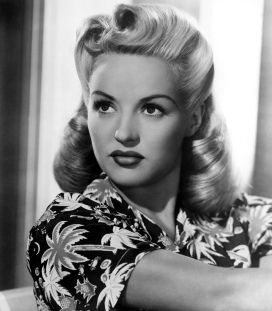
Victory rolls have become one of the most easily recognisable hairstyles of the 1940’s. Although they were rarely seen on the pinup girls in paintings, calendars, playing cards etc. and weren’t a common everyday hairstyle, they were often worn by Hollywood’s glamour girls like Betty Grable.
Creating Victory rolls the way Nan did can be tricky and quite frustrating, but as with anything, practice makes perfect. Here’s how to do it:
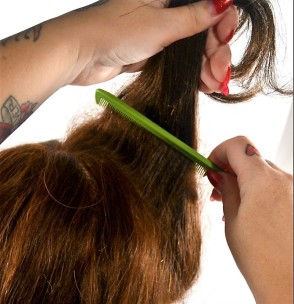
- After removing pin curls or rollers, gather hair from just behind your ear right up to the top of your head, giving you enough hair to work with. Then, section this part into the number of rolls you want to make. For this guide I’ve chosen to do just two as this is the most common number of rolls.


- Take the first section of hair to be rolled. If your hair is fine you may want to backcomb it a little to add volume to your victory roll, it will also help the hair stick to itself making it easier to roll. Smooth out the front of the section and spray with hairspray to help control flyaways.
- Wrap the section of hair around 2 or 3 fingers depending how large you want your rolls to be, starting 2/3 of the way down the section tucking in the ends as you roll.
- Pinch the roll and slide your fingers out leaving a ring.


- Roll your hair up towards the top of your head and work out which direction you want your rolls to face. Your victory rolls don’t have to be symmetrical but they should always face the same direction. Never have one facing forward and one the other facing up.

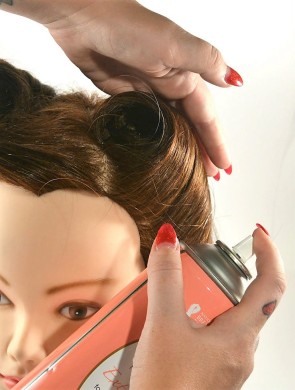
- Once your roll is in place secure with a bobby pin in the back of the roll with one prong of the pin against your head and the other into the roll. Then put another one at the front. You may need more than one bobby pins to secure your roll.


- Next, glide the hair back against your head so you can no longer see through the hole. Secure with a couple of bun pins and spray with hairspray gently smoothing any flyaways down and spray again (your victory rolls should always be smooth and neat). I like to spray a little hairspray into the hole and neaten up any stray hairs so it doesn’t resemble a trapdoor spider’s nest.


- Repeat on the other side.
- The back of your hair can be left out curled, pulled to the side into a ponytail, put into a snood, the options are endless. Play around with different ways of styling the back, you never know what combinations you may come up with.
So there you go, that’s my little guide on how to create Victory rolls, of course you may do yours differently and if you still struggle with them remember that practice makes perfect. Please forgive the poor quality photos in this tutorial too, I took them myself years ago when I was writing my book and didn’t know how to use my DSLR properly. I also used a shoddy editing program too. Oops!

One thought on “Victory Rolls and How To Do Them”